Posts

Showing posts from May, 2017

Address Book - Part 4 ( Multiple Components and use of @Input)

Image
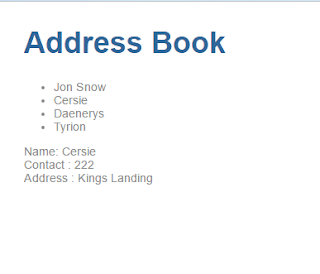
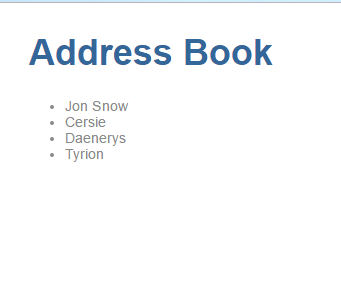
Let us continue from where we left in the previous post . In this post we will Make our address book project modular. Having Input to our components Our app.component.ts is doing everything, it is holding all the data displaying all the components. If  in future, we have to add a few more features to the address book module, chances are the entire file will become a mess. (Here we need to note that atleast our contact.html is a different file, having it in the same class would reduce code readability) In Step 1 , we will convert our existing code into a modular code. We will create a contact.ts class, which will hold the class Contact. export class Contact { name : String ; contactNumber : Number ; address : String ; } Next, we will create a contact.dummy.ts which will hold the dummy data of the Contacts. import { Contact } from './contact' ; export var DUMMY_CONTACTS : Contact [] = [{ name : "Jon Snow" , cont

Address Book - Part 3 (ngFor, ngIf and click)

Image
In continuation with the previous post . We will add the following features to our address book Multiple contacts Click on a contact on get contact information In order to have multiple contacts, we need to store them in an array . Next to display all the contact names, we need a loop which will iterate over the contacts and display contact information( ngFor directive). The app.component.ts will have an array of contacts: 1 2 3 4 5 6 7 8 9 10 11 12 13 14 15 16 17 18 19 20 21 22 23 24 25 26 27 28 29 30 31 32 33 34 35 36 37 38 39 40 41 import { Component } from '@angular/core' ; class Contact { name : String ; contactNumber : Number ; address : String ; } @ Component({ selector : 'my-app' , templateUrl : './contacts.html' }) export class AppComponent { title = "Address Book" ; contacts : Contact [] = [{ name : "Jon Snow" , contactNumber : 111 , address : &quo

Address Book - Part 2

Image
A step further of the previous post . In this post we will Save our html in another file Create a data structure to hold contact data Our datastructure for contacts should hold the following information for now: name number address Make the following changes in our application app.component.ts -> 1 2 3 4 5 6 7 8 9 10 11 12 13 14 15 16 17 18 19 20 21 22 23 24 25 import { Component } from '@angular/core' ; class Contact { name : String ; contactNumber : Number ; address : String ; } @ Component({ selector : 'my-app' , templateUrl : './contacts.html' }) export class AppComponent { title = "Address Book" ; contact : Contact = { name : "Jon Snow" , contactNumber : 111 , address : "North" }; } Line 4 gives a new datastructure to hold contact information. Line 14 tells that the view is in the html file. Create a new file contact

Address Book - Part 1

Image
We will go forward with the previous project structure , and build a simple address book. Note: We can have our npm server running throughout our development (using npm start ), any code changes will be reflected immediately. Creating the address book will be a step by step procedure. Let us start by displaying the name and the phone number of the contact. Let us provide the provision to edit the number of the contact. Our final product, at the end of this post, will be: Any changes in the text box should immediately be reflected in the text below. Lets get started. Make the following changes in app.component.ts import { Component } from '@angular/core' ; @ Component({ selector : 'my-app' , template : ` < h1 > Address Book < /h1> < label > Name :< /label> {{name}} < br > < label > Contact :< /label> <input [(ngModel)]="contact"> < br > {{name}} , {{contact}} ` }) ex

Angular: step up and Set up your Environment

Image
Lets get started with the angular development environment setup. Note: I have npm (3.8.6 version), node (6.0.0 version) installed on my machine. Install npm on your machine I have downloaded the sample application from the official angular site: Setup Downloaded and unzipped the app in the setup folder. Run npm install from command promt. You can ignore the warning, your final project structure will look like this: Now run npm start from command promt. Let us check the importance of each file in this project: Filename Description package.json It contains the metadata for the npm project. This helps npm to identify the project as well as provide the project dependencies. src/app/app.component.ts Defines the AppComponent along with an HTML template, CSS stylesheet, and a unit test. It is the root component of what will become a tree of nested components as the application evolves. src/app/app.module.ts Defines AppModule, the root module that tell

Angular Index

Angular: An Introduction Angular: step up and Set up your environment Address Book - Part 1 Address Book - Part 2 If and For Address Book - Part 4 ( Multiple Components and use of @Input) Address Book - Part 5 ( CSS Styling our Angular app ) Developer Facts for Angular